
Unit Testing Polymer Elements
Polymer v0.5.0
Table of contents
Writing tests feels great. When you’ve written a new Polymer element and verified it works as expected you know the API you’re shipping is rock solid. You see ticks in your test runner and all your tests pass. BOOM! You’ve just written some of the most reliable code ever.
Okay, not quite, but you need tests because you’re not Chuck Norris. Chuck Norris’ unit tests pass before he’s even written any code. In this guide, we’ll walk through some tips for writing unit tests for your own elements using web-component-tester. We’ll cover testing conventions, assertion styles and a quick tutorial.
Quick Start
Our boilerplate for new Polymer elements, <seed-element>, contains everything you need to start writing unit tests for your element. To fetch it and install all the dependencies you’ll need, run the following commands in the terminal:
    $ mkdir development
    $ cd development
    $ git clone git://github.com/PolymerLabs/seed-element.git
    $ git checkout v0.1.5
    $ cd seed-element
    $ bower install
    $ npm install -g web-component-tester
    $ wct
The WCT (web-component-tester) tool will run your tests in multiple browsers at once. If all goes well, you should see some output resembling the following in your terminal:
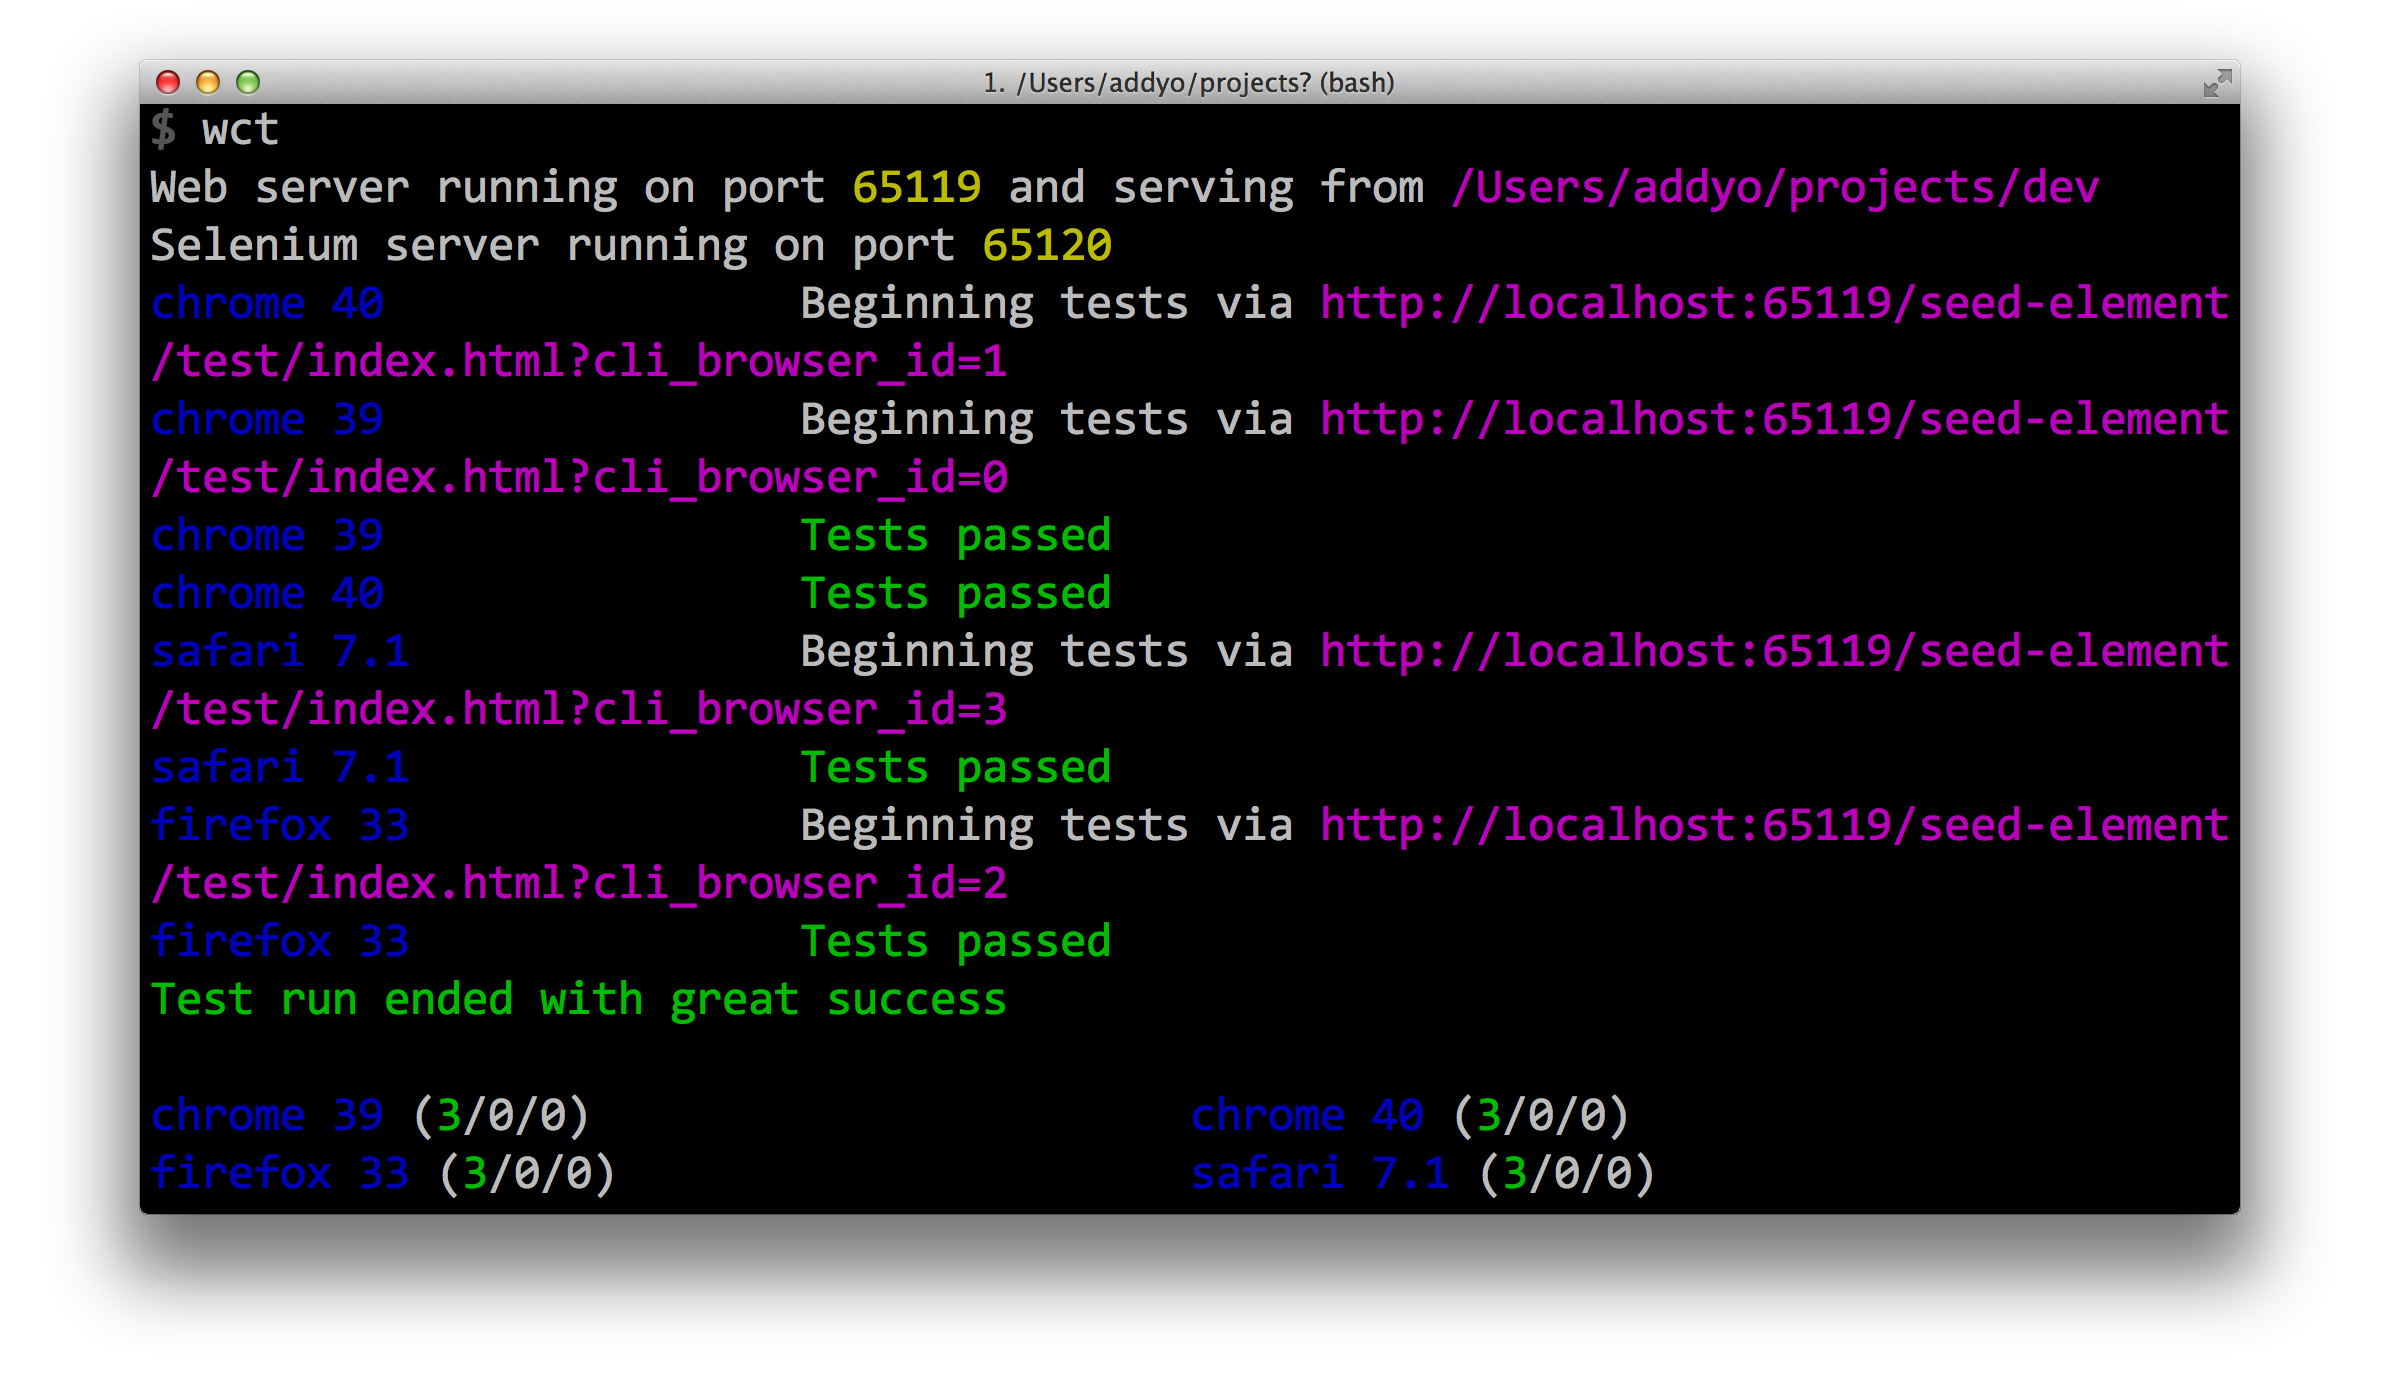
You can then start authoring new tests in the test directory and look at a sample test we’ve written for you. Continue reading to learn about our recommended way to structure and author your tests.
web-component-tester
The Polymer team created web-component-tester to make testing a breeze. It uses some familiar tools for unit testing elements - namely, Mocha and Chai. Using Mocha as our testing framework allows us to write tests that support development and integration without the need for workarounds.
Mocha
Mocha is a flexible, feature-rich testing framework that runs in both node and the browser. It makes asynchronous testing simple and allows for accurate reporting while mapping uncaught exceptions to the correct tests cases. There are quite a few online guides available in case you’re new to the tool.
The only real piece missing from Mocha are helpers for performing assertions against your code. That’s where Chai comes in.
Chai
Chai supports a lot of the assertion styles you might want to use (expect, assert, should). The real difference in these styles is their readability and you’ll likely pick a style that fits in with your or your teams own preferences. The Chai docs explain their assertion styles in more detail.
Out of the box, web-component-tester also includes Lodash to repeat fewer things and Async to keep your sanity.
Why create a new tool?
Great question. When working with Web Components, we regularly find ourselves wanting to write tests within .html sources. A large number of tests require that you write HTML and we wanted something more convenient than two files per suite - your fixtures and tests. We also wanted a test runner that didn’t have configuration hooks for running server-executable code to allow for environments like Travis CI.
We considered both Karma and Protractor while evaluating our tooling options. Karma unfortunately didn’t support WebDriver commands outside of lauching and lacked first-class support for .html sources. Protractor had a similar JS-centric view of the world and focused more on integration style testing rather than unit style testing.
Ultimately, having considered the options we found it more efficient to build WCT rather than modify these tools outright.
Unit test helpers
WCT-specific helpers
WCT includes a number of helpful utilities meant to ease testing Web Components. These include flush() and testImmediate().
flush() triggers a flush of any pending events and observations, ensuring that notification callbacks are dispatched after they have been processed.
testImmediate() allows you to run your test at declaration time before Mocha has begun tests. It’s handy when you need to test document initialization. testImmediate(name, testFn) accepts a test name and test function. If an argument is accepted to testFn, the test will be treated as async, similar to Mocha tests.
Note that with testImmediate(), should any errors be thrown asynchronously they cannot be tied to your test. If you wish to catch them and pass them to the done event instead, a safeStep() utility is available to help.
Mocha helpers
Mocha also supports some useful, but less well-known helpers which we’ve found incredibly useful when writing tests for Polymer elements. These include:
test.skip- skip a pending test casesuite.skip- skip a pending test suitetest.only- an exclusive test casesuite.only- an exclusive test suitesuiteSetupandsuiteTeardown
Polymer’s testing conventions
Each test tests the component’s DOM, templates, Shadow DOM and API. You don’t have to use this convention if it doesn’t match your tastes.
Typically, we write many assertions inside of a single large test. This is on purpose as we find this approach keeps our tests relatively clean. That said, as we include many assertions in one test, it can be challenging to know where your failures are. We recommend including a message in each assertion to assist with this.
Note: Our approach allows us to author and run tests that include HTML quite easily, but comes at the cost of speed. If you don’t care about running lots of tests constantly, our approach works quite well for testing Polymer elements.
.js Suites
web-component-tester test suites can either be .js sources, which run in the context of your text index. For example, test/awesome-tests.js:
suite('AwesomeLib', function() {
  test('is awesome', function() {
    assert.isTrue(AwesomeLib.awesome);
  });
});
.html Suites
Or, you can write tests in separate .html documents. For example, test/awesomest-tests.html:
<!doctype html>
<html>
<head>
  <meta charset="UTF-8">
  <script src="../../web-component-tester/browser.js"></script>
  <link rel="import" href="../awesome-element.html">
</head>
<body>
  <awesome-element id="fixture"></awesome-element>
  <script>
    suite('<awesome-element>', function() {
      test('is awesomest', function() {
        assert.isTrue(document.getElementById('fixture').awesomest);
      });
    });
  </script>
</body>
</html>
Structuring tests as HTML pages
We prefer to run entire HTML pages (e.g pages containing elements) as individual tests in a suite. In the same way your Web Components are used in HTML, it’s convenient to set up and test your elements in the same sort of environment.
To create a new HTML test page:
-
Create a new HTML file in the tests directory (e.g core-selector-basic-test.html). You can use our
<seed-element>unit test boilerplate as a starting point. It already references the relevant web-component-tester dependencies you’ll need. -
Author your tests in the file you created (e.g in
core-selector-basic-test.html). Some tips are available in the tutorial later on covering how to test attributes and events. -
The WCT test runner creates an implicit suite for the entire test file. This means you can have any number of top level
tests as you would like. That said, you can optionally define a new suite for a set of tests around a new element too. For the my-tabs element, this might look as follows:suite(‘
', function() { // ... }); -
Finally, add your test to the
test/index.htmlfile’sloadSuiteslist. This would look as follows:// Load and run all tests (.html, .js) as one suite: WCT.loadSuites([ ‘core-selector-basic-test.html’, ]);
That’s it. In general, you should now be able to run wct and see any tests defined in the suite running.
Assertion styles
We can quickly compare the differences in assertion styles using an existing element as an example. Let’s take <core-selection>, which is used for making a list of items selectable. In our HTML, let’s assume we’ve added core-selection as follows:
<core-selection></core-selection>
And then somewhere else in our application, we’re listened out for events being emitted from this element once an item has been selected in it. The event in question is “core-select”.
A simple assertion test using an assert-style test for this could be written as follows:
var selector = document.querySelector('core-selection');
selector.addEventListener('core-select', function(event) {

   // with an assert style
   assert.equal(event.detail.item, '(item)');

   // or an expect style
   expect(event.detail.item).to.equal('(item)');

   // or should style
   event.detail.item.should.equal('(item)');
   done();
});

selector.select('(item)');
Chai supports all of the above assertion styles but we’re going to use the first option (“assert style”) for the sake of simplicity.
Note: If you wish to use one of the other assertion styles, including expect, these are made available by default. If however you want to use Chai’s should assertion styles, you will need to set this up manually.
Tutorial
In this tutorial, we’re going to add an existing Polymer element, <core-selector> to a fresh <seed-element> project as a feature. We’re then going to write tests for it.
core-selector is an element that manages a list of elements that can be selected. It happens to build on the core-selection element we used in the last section. Go go composability!.
Note: we generally recommend that tests for individual elements live alongside the source for those elements. This is why the <seed-element> boilerplate includes a test directory by default.
Step 1: Install the element
First, get <seed-element> setup in a new development directory (if you haven’t already in the Quick Start):
# Create a new directory to work in
$ mkdir development

# Move into the development directory
$ cd development

# Get the latest version of seed-element
$ git clone git://github.com/PolymerLabs/seed-element.git

# Move into the seed-element directory
$ cd seed-element

# Install the seed-element dependencies
$ bower install

# Install web-component-tester globally
$ npm install -g web-component-tester
You can then install <core-selector> beside into your <seed-element> project as follows:
$ bower install Polymer/core-selector --save
Note: You can learn more about our recommendations for dependency paths when working with <seed-element> in our reusable elements guide.
Step 2: Write your first test file
We begin writing our first test with a new HTML file in the “tests” directory of <seed-element> which we’ll call core-selector-tests.html. This will contain the tests and a few dependencies for running them. For our new test, we will need:
-
The Web Component polyfills (webcomponents.js)
-
web-component-tester
-
An import for our element (core-selector)
We can repurpose the existing “basic-test.html” file for this purpose. Let’s rename it to “core-selector-tests.html” and customize it for <core-selector>:
  <script src="../../webcomponentsjs/webcomponents.min.js"></script>
  <script src="../../web-component-tester/browser.js"></script>

  <!-- Step 1: import the element to test -->
  <link rel="import" href="../seed-element.html">
</head>
<body>

<!-- You use the document as a place to set up your fixtures. -->
<seed-element></seed-element>
Step 3: Writing test assertions for attributes
So back to core-selector-tests.html - let’s flesh out our <core-selector> to include some real items:
<core-selector id="selector1" valueattr="id">
  <div id="item1">Item 1</div>
  <div id="item2">Item 2</div>
  <div id="item3">Item 3</div>
</core-selector>
Give it an ID so we can easily reference it amongst other instances on the page.
Next, we’ll query the DOM for the “selector1” element we just included included:
<script>
  var s = document.querySelector('#selector1');

  suite('<core-selector>', function() {

    // ..

  });
</script>
We can now begin testing our element.
First, we define a test in the suite for our core-selector-tests.html file as follows:
suite('<core-selector>', function() {
  test('our first test', function() {
      // ...
  });
});
Let’s test that nothing is by default selected (i.e that our current selection is null). We can replace “our first test” label with the more descriptive “nothing is selected by default” while we’re at it:
test('nothing is selected by default', function() {
  assert.equal(s.selected, null);
});
Let’s run wct to ensure everything is working as expected; awesome, all good!
Next, add the core-selector-tests.html file we’ve started work on to test/index.html. We can use the loadSuites() method to achieve this so that it is run with all of our other tests:
<script>
  WCT.loadSuites([
    'core-selector-tests.html'
  ]);
</script>
We can now run the wct command to execute the tests written above. If all goes well your tests should be green. Great.
How about testing if an attribute is the default value we expect it to be? <core-selector> supports a multi attribute in case you want to support multiple items being selectable. Let’s add this before done(); along with our other assertions:
test('if an attribute is the default value expected', function() {
  assert.isFalse(s.multi);
});
So far, so good.
As <core-selector> has a property items representing the current list of items defined as children, we can also test to make sure it understands that we have 3 items at the moment.
test('if an attribute is the default value expected', function() {
  assert.equal(s.items.length, 3);
});
<core-selector> by default uses a specific CSS class to highlight when an item is selected. It’s called core-selected (big surprise!). A user can override this class by setting the custom selectedClass attribute on this element. Let’s test to make sure the right class (default) is set.
test('if the correct class is used on selection', function() {
  assert.equal(s.selectedClass, 'core-selected');
});
Step 4: Testing Asynchronous Changes
Many Polymer elements rely heavily on observers to perform their work - often directly via observe declarations or indirectly via tools such as template binding. The unfortunate reality is that you will often need to set up asynchronous tests to deal with this.
Let’s test support for assignment to the selected property!
When mutating your elements, it is a good idea to ensure that your changes are cleaned up after the test. One approach is to have multiple fixture elements (one for each test that performs mutations). Another is to take advantage of Mocha’s setup/teardown/suiteSetup/suiteTeardown helpers.
We’ll go with the setup/teardown approach for this example, by adding a new suite to contain our mutation tests:
suite('with two selected items', function() {

  // Clean up after ourselves.
  teardown(function(done) {
    s.clearSelection();
    s.multi = false;
    // Wait for observers to resolve before moving on to more tests.
    flush(done);
  });

  test('single selects by index', function(done) {
    s.selected = 1;
    // We flush to allow observers to resolve before we check the state:
    flush(function() {
      assert.equal(s.selectedIndex, 1);
      assert(!s.children[0].classList.contains('core-selected'));
      assert(s.children[1].classList.contains('core-selected'));
      assert(!s.children[2].classList.contains('core-selected'));

      done();
    });
  });

  test('multi selects by index', function(done) {
    s.multi = true;
    s.selected = [0, 2];

    flush(function() {
      assert.equal(s.selectedIndex, [0, 2]);
      assert(s.children[0].classList.contains('core-selected'));
      assert(!s.children[1].classList.contains('core-selected'));
      assert(s.children[2].classList.contains('core-selected'));

      done();
    });
  });

});
So the first thing you may notice is our use of flush(). As we covered earlier, flush allows us to asynchronously dirty check pending objects are observed and ensures notification callbacks are dispatched accordingly. A synchronous alternative is [element].deliverChanges(), but that only works for observers declared directly on the element.
By calling flush after making changes to the element, we can ensure that our tests are performing assertions after all observers have resolved and events have fired. If we were to perform our asserts prior to that, they would most likely be testing the wrong state!
Additionally, notice that all of the callbacks we pass to Mocha have an extra done argument. This tells Mocha that it should treat the callbacks as asynchronous.
Step 5: Writing test assertions for events
What about testing events? A simple event supported by <core-selector> that we can test is the “core-select” event. It’s fired every time a different item in a list is selected.
If this is the case two properties - s.selectedItem and e.detail.item (returned by the event) should be the same. Hooking this up to the core-select event, we get:
test('core-select fires when selection changes', function(done) {
  s.addEventListener('core-select', function(e) {
    assert.equal(e.detail.item, s.selectedItem);
    done();  // Finish our test.
  });
});
Great. Now to set the selected item in the list to “2” we can write:
test('core-select fires when selection changes', function() {
  // ...
  s.selected = 2;
});
Which will trigger the core-select event to be fired (asynchronously).
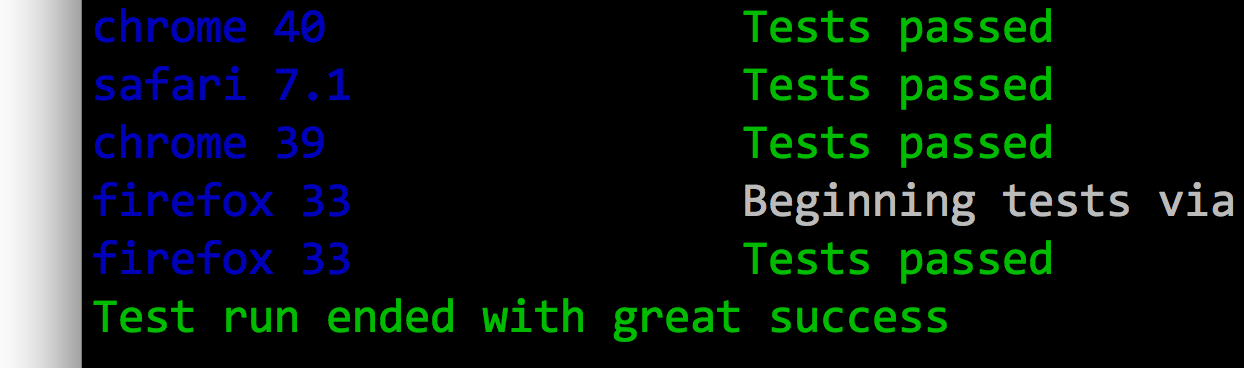
As we can see, when we run wct once again we’re still all green:

Note: You may want to test outside usage of your element as part of polymer-ready. Code written outside of test functions will execute immediately, including suite functions such as the one above. By default, WCT will wait until polymer-ready has completed to run your tests to ensure everything behaves as expected. However, you may not have upgraded elements outside of them. For scenarious like this, the testImmedate helper is useful for running tests before polymer-ready.
That’s it! We now have some simple assertion tests to test the attributes and events for a Polymer element work as expected. For a more complete reference to how we’ve gone about unit testing some of our elements, including <core-selector>, take a look at <core-tests>.
Note: While not covered in this guide, the WCT tool has Gulp and Grunt integration as well as support for testing both local and remote browsers. For detailed information on how to use these features, see the WCT documentation.
Conclusion
Go forth and write tests! They can be simple and powerful.
Remember, testing Web Components isn’t vastly different to unit testing the JavaScript components you build everyday. Many of the same best practices apply. You’re still working with events, objects and an API.
The beauty of sticking with Mocha and Chai is tests can execute equally well in both the browser and continuous integration.
Thanks for reading and do let us know if you have any questions about unit testing your elements!
More Unit Test Samples
If you are looking for an example of a real-world element using web-component-tester to author and run tests, checkout the tests for the google-map element.